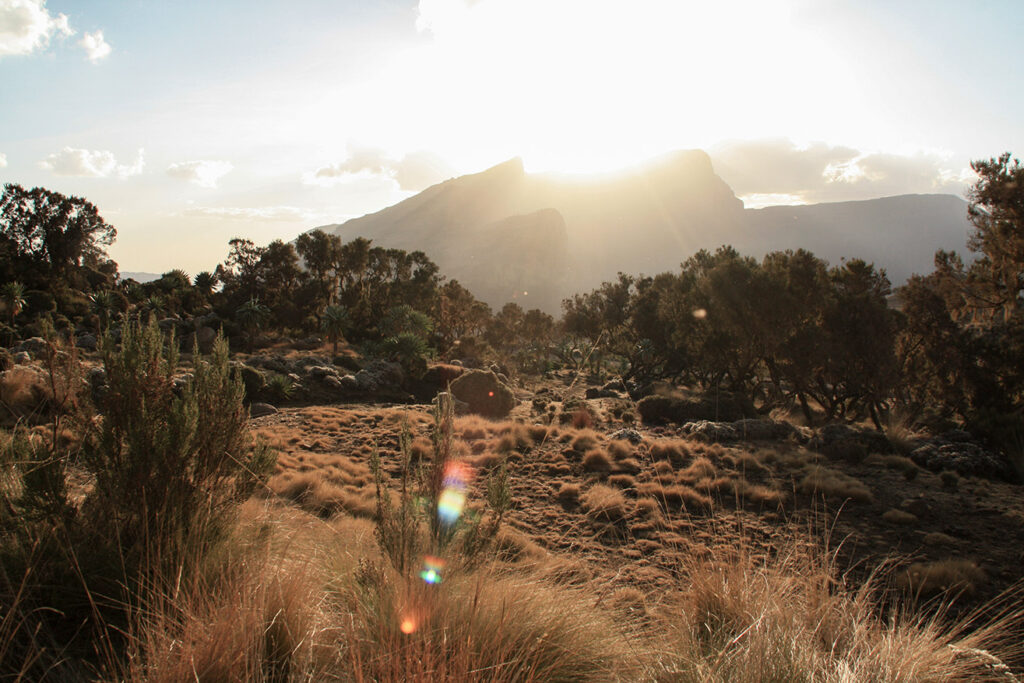
Intentional Lens Flare in Landscape Photography
“A painter should begin every canvas with a wash of black, because all things in nature are dark except where exposed by the light.”
Leonardo da Vinci
The majority of landscape photographers strive to capture perfect photographs from a technical point of view, their attention meticulously focused on
- image sharpness,
- all objects being in focus, from the foreground to infinity, and
- a balanced histogram showing no blown-out highlights and clipped shadows
The means to achieve these landscape photography essentials are
- setting a medium lens aperture of f/5.6 … f/8 (the range where for most lenses center and corner sharpness are maximized) and putting the camera on a secure tripod to prevent camera shake,
- dialing down the aperture to f/8 … f/11 to widen the focal plane or in more extreme cases of close foreground elements, to employ the method of focus stacking,
- shooting during the golden or blue hours of the day when soft light falls on trees, hills, and fields, creating beautiful colours and subdued contrasts.
Now, what if we intentionally choose to ignore all these points?

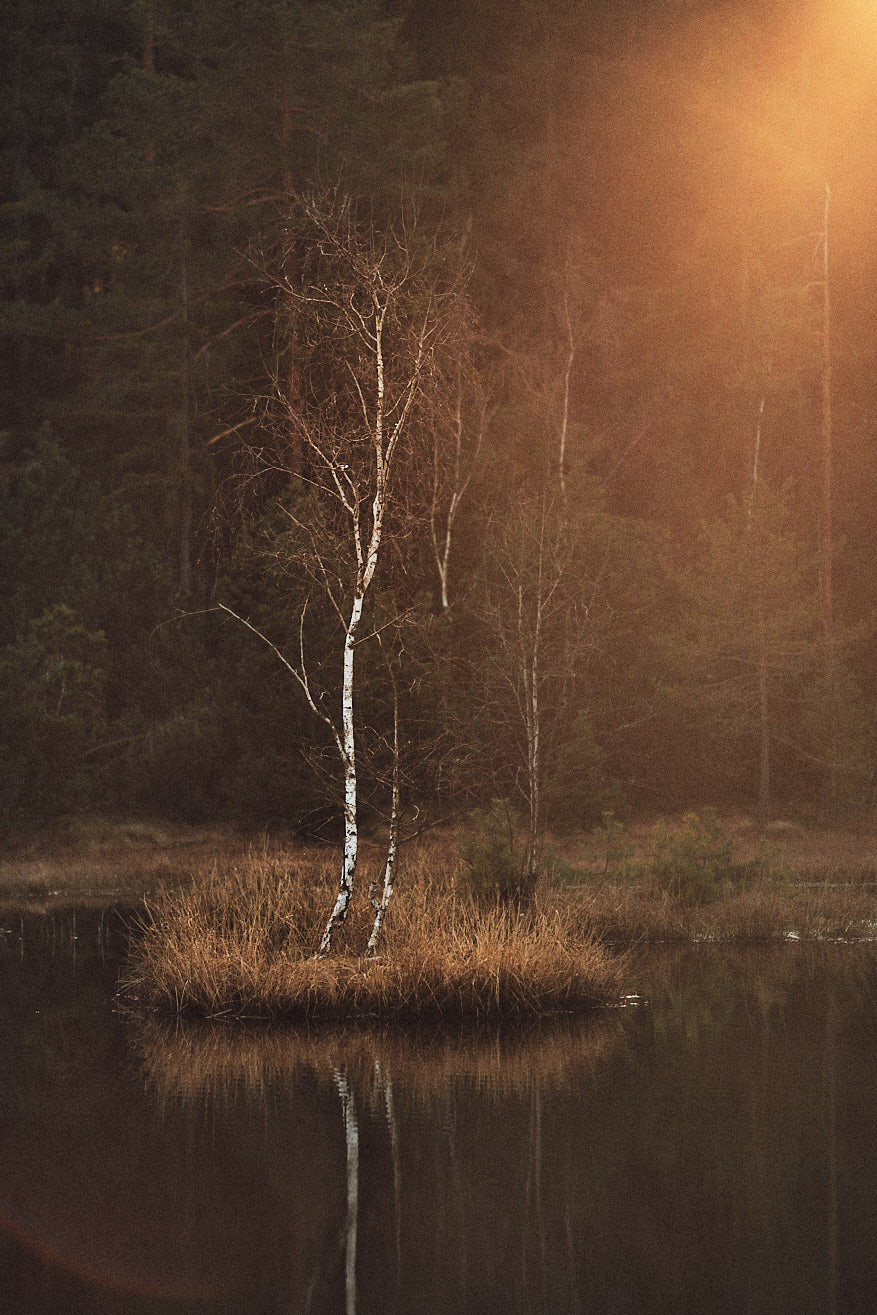
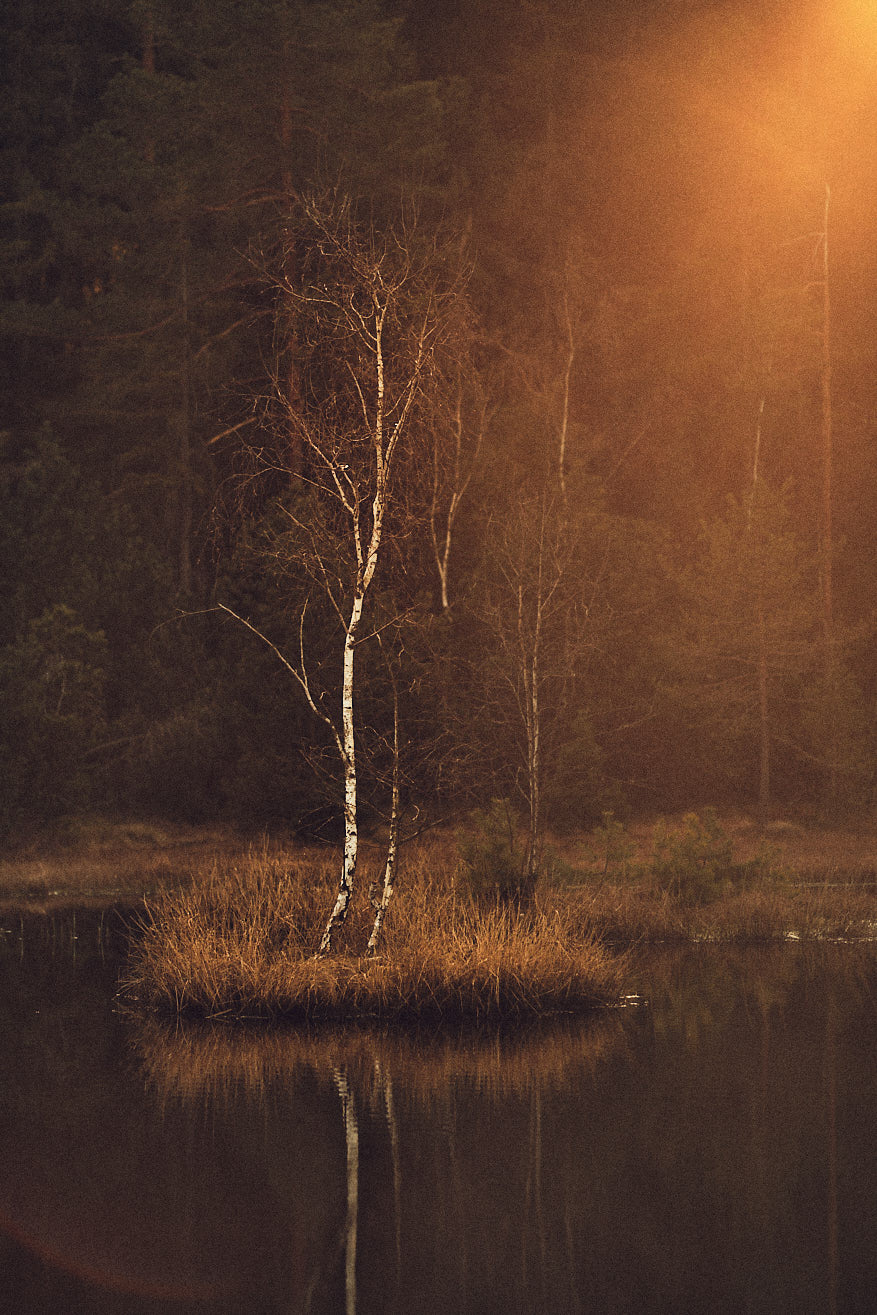
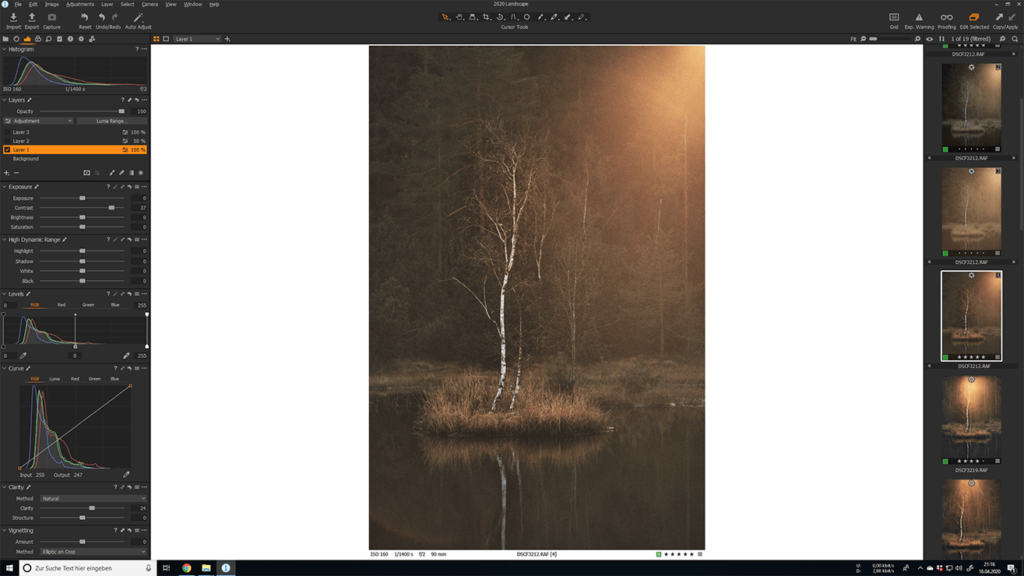
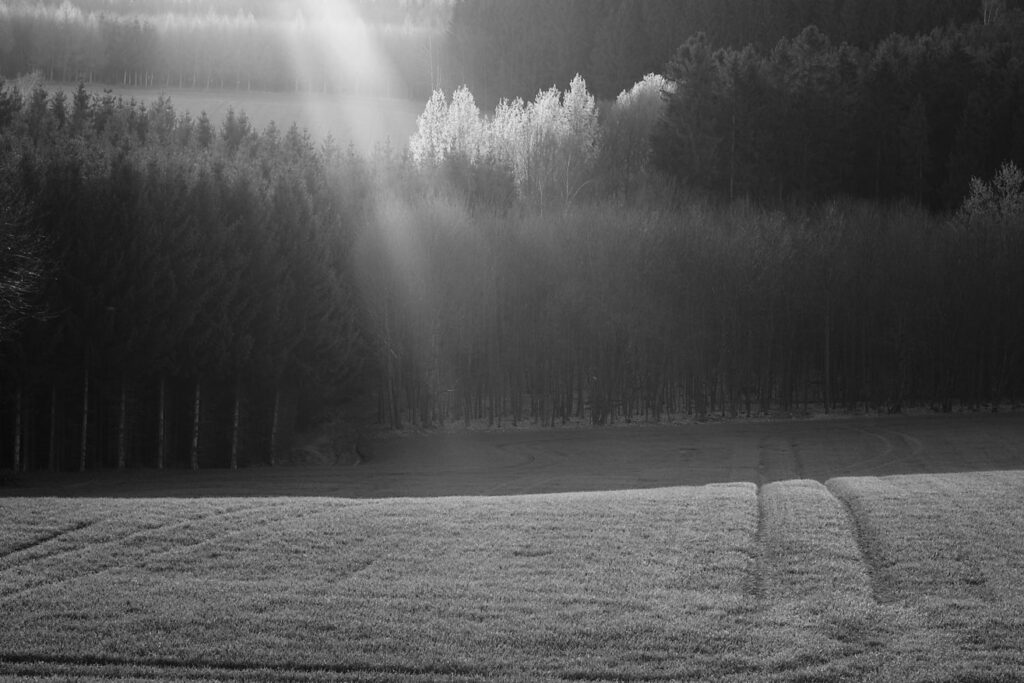
Fujifilm X-T3 / Fujinon XF 90mm F/2 R LM WR
f/2 | 1/1,400s | ISO 160
The image of the fledgling birch tree on his little private island within a swamp lake in the German Ore Mountains was shot throwing the rules into the wind. Noticing the simple but effective composition of the white trunk in front of a dark but busy forest background and its pleasing reflection in the muddy waters, the following points needed to be considered:
Positive
- strong minimalistic composition
- symmetry through reflection
- harmony of muted colours
Negative
- sun shining against the shooting direction (backlit scene)
- low contrast
- busy and distracting background
How to make it work? The idea sprang up in my mind to isolate the tree using a tele prime lens and a wide-open aperture to blur the background to reduce its negative visual impact and to keep the eyes of the observer on the subject in the middle of the frame.
Angling the lens slightly in the direction from where the sun was shining through the gaps in the background forest enabled the myriads of photons to enter the lens and flood the camera sensor with light, dramatically reducing the contrast of the scene and creating pleasing halos and light bursts. By changing the angle of the lens and the aperture ever so slightly, you can control and shape the burst and flares.
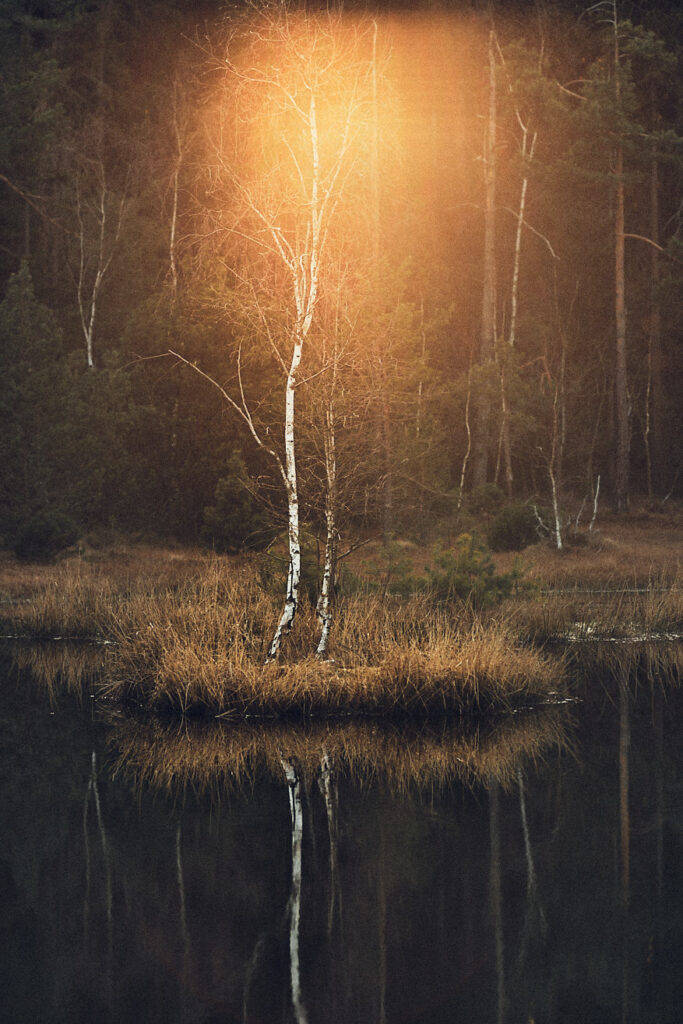
ILF – Birch Tree Island II.
f/2.8 | 1/210s | ISO 160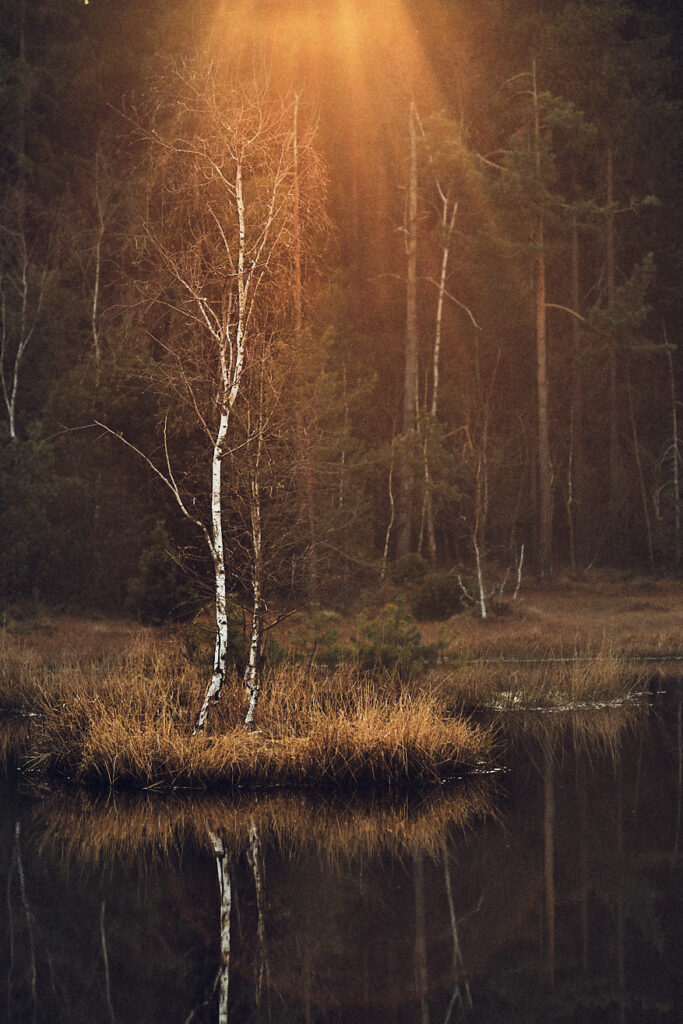
ILF – Birch Tree Island III.
f/2.8 | 1/550s | ISO 160
The type of lens you choose will dramatically impact the shape of the flare. Prime lenses tend to produce softer gradations while zoom lenses are usually characterized by more pronounced chromatic halos, flaring and defined star-like structures. Stopping the lens down to f/16 creates the infamous sun star which is wildly popular these days on Instagram and other Social Media platforms but which I dislike. And not only because it is easily produced on modern smartphone cameras while the soft flare is not…
This technique of Intentional Lens Flare is popular and well documented in portrait photography, leveraging the pleasing effect of light flooded airy backlit scenes to induce warming summer mood feelings.
Fujifilm X-T3 | Fujinon XF 35mm f/1.4
f/1.4 | 1/3.800s | ISO 160
The belowimage shows another backlit scene shot with a travel zoom lens at an f-stop of 9. Due to the zoom lenses’ design of multiple consecutive glass elements, the refraction of light inside the lens is much more pronounced, producing pronounced rainbow-coloured flares and halos. While it may appeal to some people, usually these optical byproducts are considered disctracting, and rightly so.
f/9 | 1/200s | ISO 200
A better example would be the following, slight distracting halo on the left side but overall soft flooding light from the setting sun on the right – an ovious effect of the wider aperture of f/3.5.
f/3.5 | 1/640s | ISO 100
A factor to consider before trying ILF is that a decent amount of editing the images will be needed to make them work since the straight out of camera files tend to be low on contrast and saturation.

But not to worry, the editing process requires only the most basic of tools and can be done in any software, the most popular being Adobe’s Lightroom and CameraRaw / PhotoShop, Phase One’s Capture One (which I am using) and Skylum’s Luminar, together with countless mobile applications. And no, Microsoft Paint is not a powerful post processing tool.
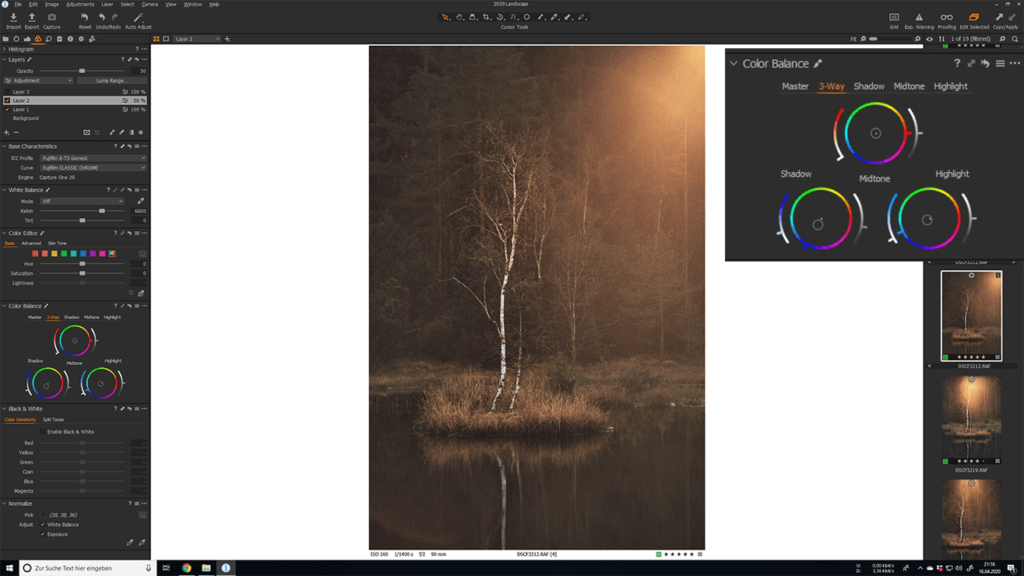
The Editing Process
The first step would be to increase tonal range of the image by moving the levels sliders inward (alternatively, you could use the sliders for highlights and shadow, or both tools for best effects since they are working slightly differently). In order to deepen the colours and to increase overall contrast, the tonal curve is modified to the infamous S-shape which tends to work with most landscape photographs. The advantage of the tonal curve over the sliders is the great amount of control across all points of the tonal range. A small fade in the blacks (moving the tone curve upwards on its leftmost point) helps further reduce the complexity in the shadows.
Since I did not want to introduce a lot of global contrast which would defy the principle of creating an airy image, I pulled the global contrast slider to the left to compensate for the tonal S-curves contrast push.
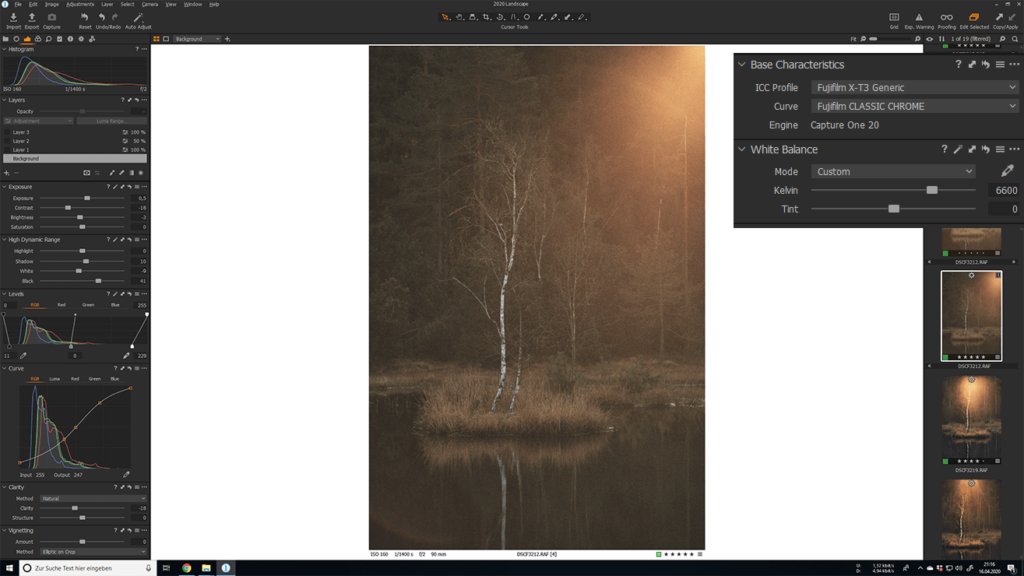
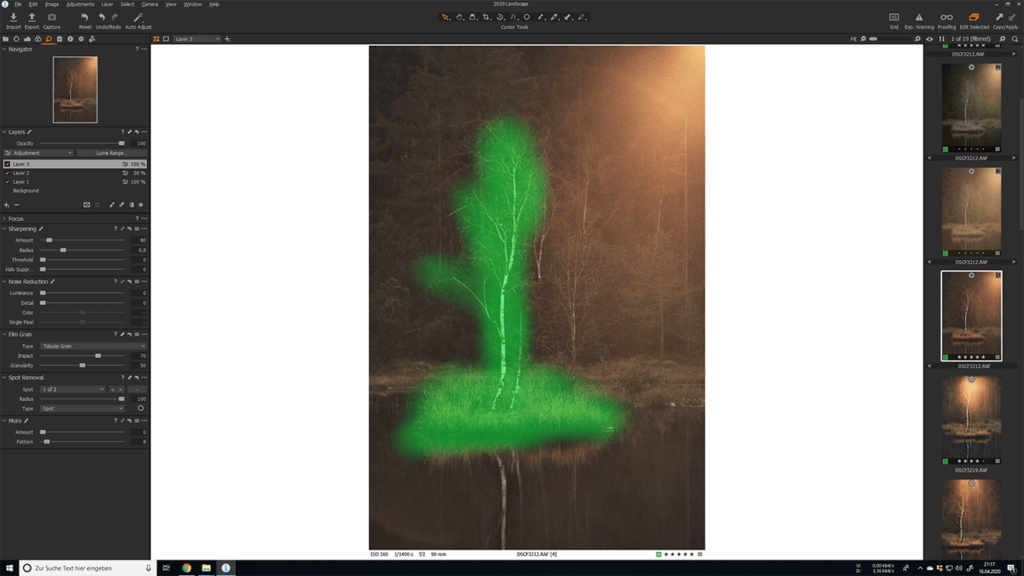
After these general adjustments, local contrast for the main subject – our lovely birch tree – is increased by means of a convenient masked layer in Capture One to make the white bark stand out even more from the background.
An optional step which I personally enjoy most during the editing is to apply an individual colour grade. An global warm shift increases the amount of reds in the image, shifting the light flare to a pleasing deep orange colour and unifying the colour range of the image. The original image had Fujifilms Classic Chrome Film Simulation applied which already compressed the colours nicely.
In cinematic style, a bit of blue was added to the shadows and a tad bit of cyan to the mid tones. It is very easy to overdo these infusions of colour.
Last but not least, as with every photograph, selective sharpening! Using a layer mask to select only the subject area helps it stand out more while avoiding unnecessary sharpening in the blurry areas which only increases granularity.
Speaking of grain, this image cries for a bucket of tabular grain, and I certainly did not apply it sparingly. Again, this is a matter of personal taste (you can guess mine by now).
In conclusion, ILF might be a situational method to apply, similar to Intentional Camera Movement (ICM) but nevertheless can produce artistic results under the right circumstances. Next time out in the field, look for an opportunity to try it out!
Thanks for reading! As always, don’t believe it, try it!
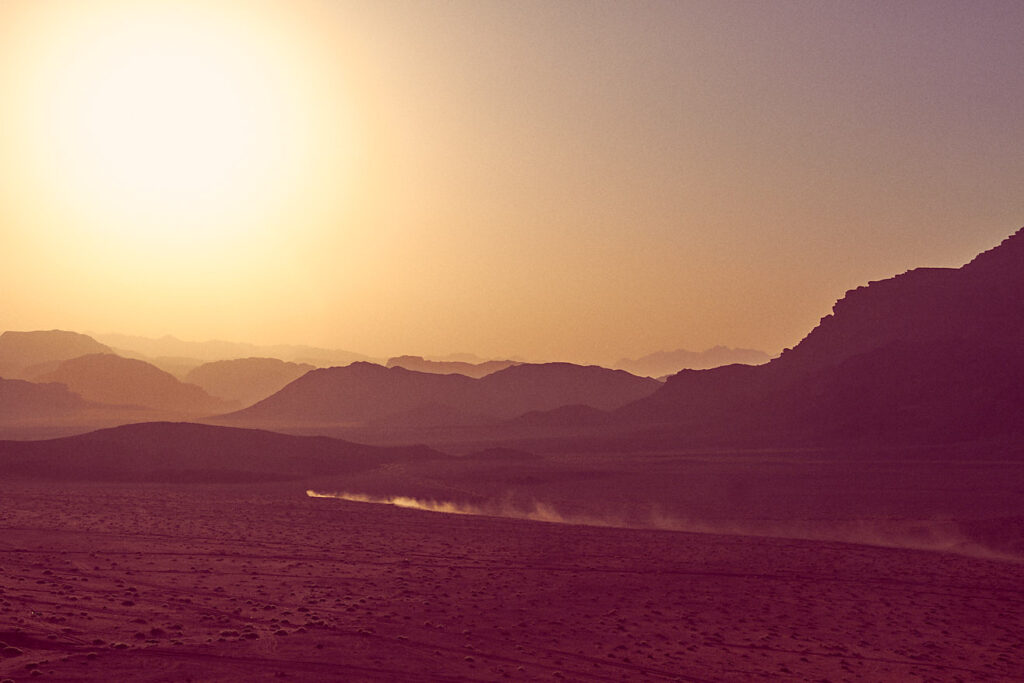
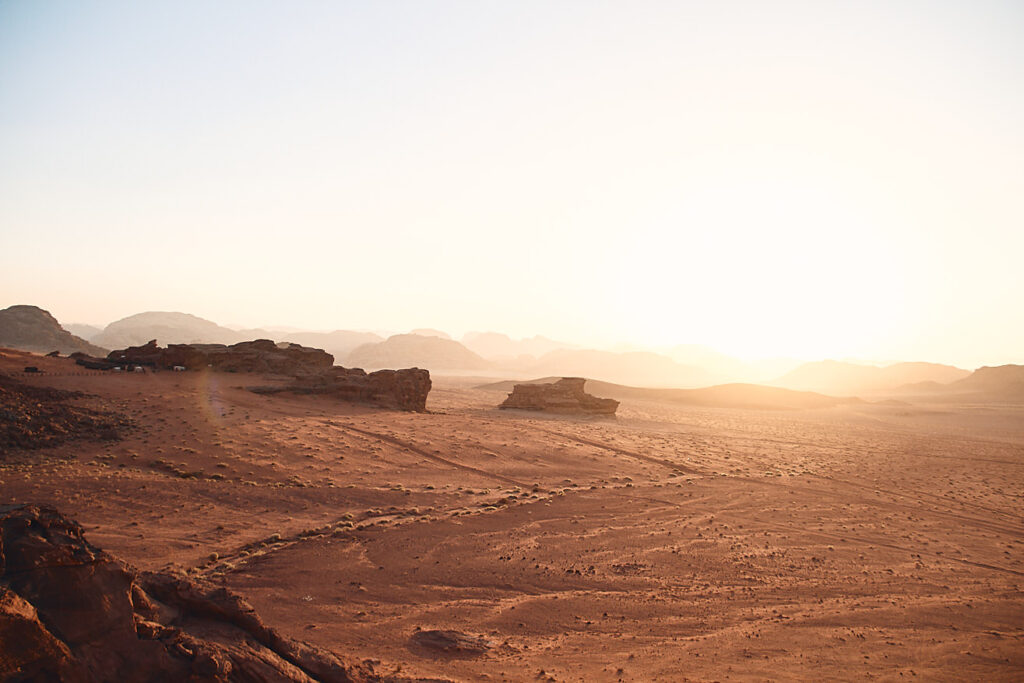
Crossing Wadi Rum at sunset. 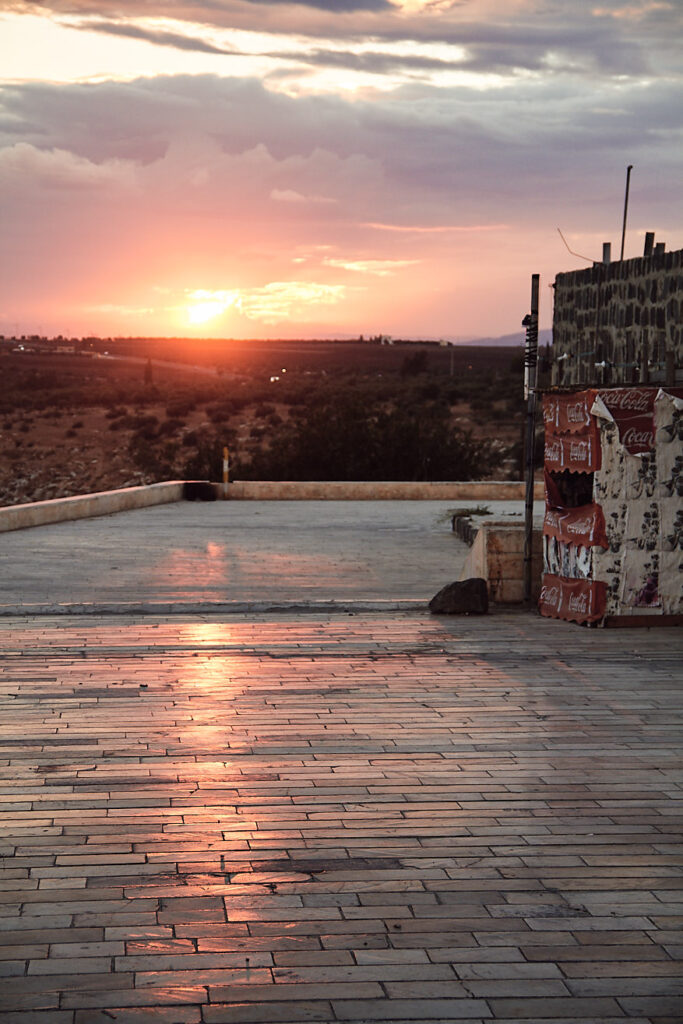
The sun sets on Um Qays. Rooftop with Coca Cola kiosk. 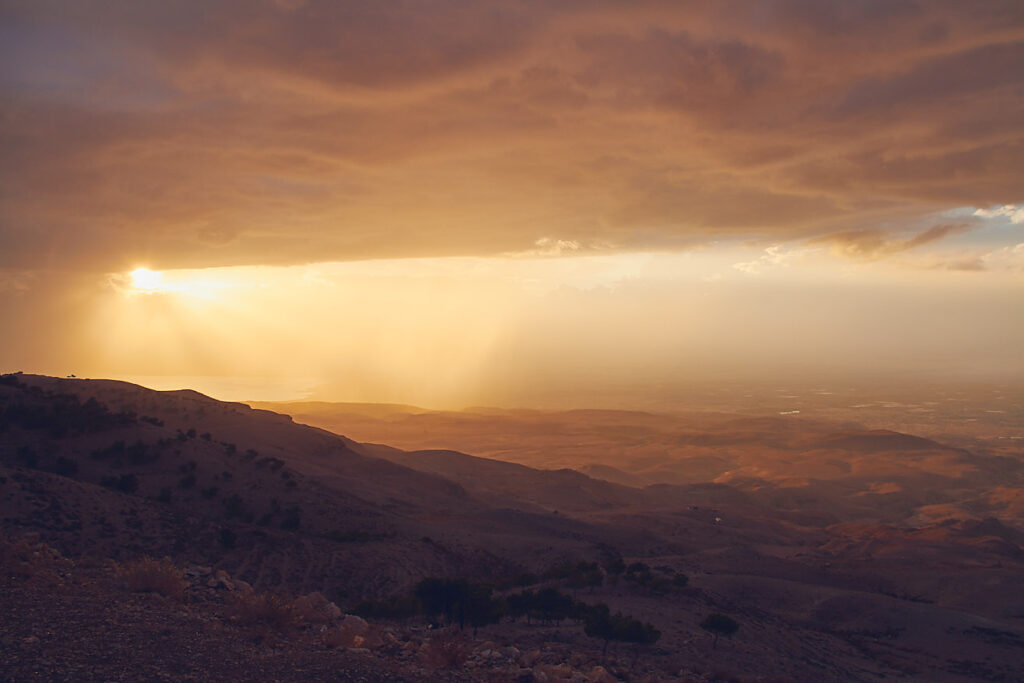
Fiery sunset above the Dead Sea. 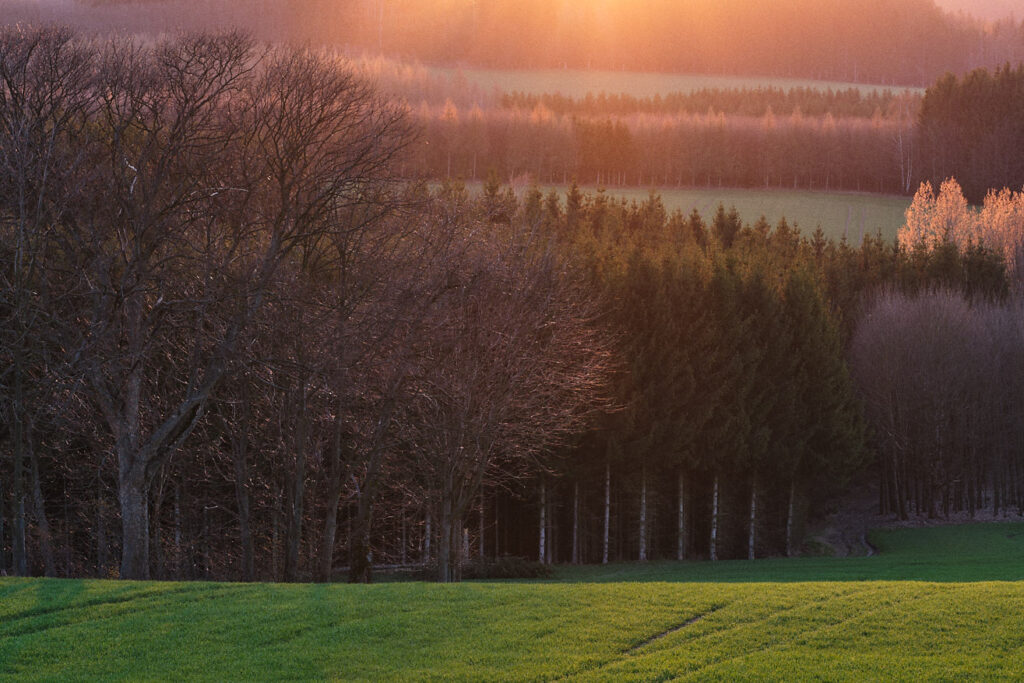
The sun sets in Wadi Araba.
No Comments